Difference between revisions of "Goniometer (Rame-Hart A-100) - Operating Procedure"
Jump to navigation
Jump to search
(image sizing) |
m (→Measurement Procedure: indent, spacing) |
||
| Line 6: | Line 6: | ||
* Note that the image through the scope is ''inverted'' upside-down. |
* Note that the image through the scope is ''inverted'' upside-down. |
||
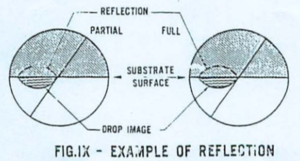
* You will also see a reflection of the water droplet on your polished substrates, as illustrated here: |
* You will also see a reflection of the water droplet on your polished substrates, as illustrated here: |
||
| − | [[File:Goniometer - Reflective Sample Illustration.png|alt=Illustration of a reflective sample.|none|thumb|Illustration of a reflective sample. Substrate is on ''top'' due to inverted image.]] |
+ | :[[File:Goniometer - Reflective Sample Illustration.png|alt=Illustration of a reflective sample.|none|thumb|Illustration of a reflective sample. Substrate is on ''top'' due to inverted image.]] |
| + | |||
[[File:Goniometer (Rame-Hart A-100) - Steps for Measuring v1.png|600x600px]] |
[[File:Goniometer (Rame-Hart A-100) - Steps for Measuring v1.png|600x600px]] |
||
Revision as of 09:23, 27 July 2020
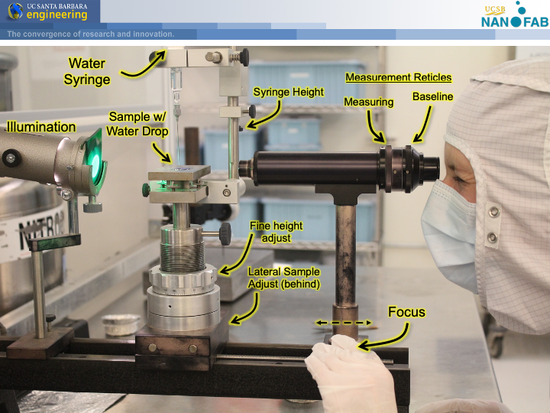
System Illustration
Measurement Procedure
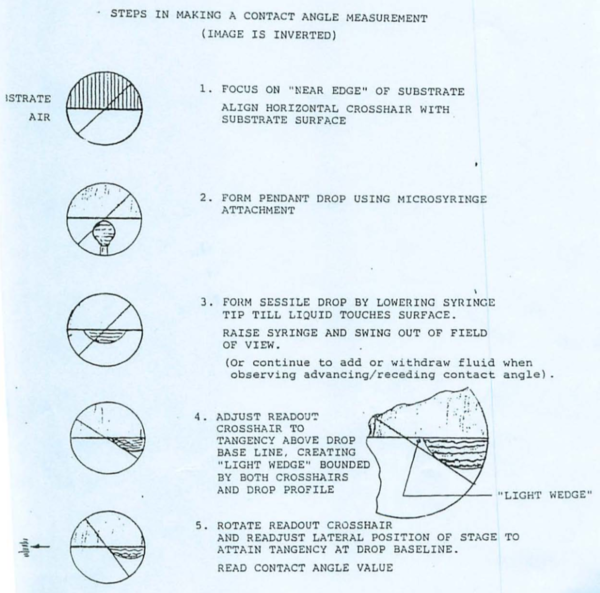
To measure the contact angle of water on a surface, perform the following procedure.
- Note that the image through the scope is inverted upside-down.
- You will also see a reflection of the water droplet on your polished substrates, as illustrated here:


