GoPro Hero8 Black (Internal)
Jump to navigation
Jump to search
Use this camera with various mounts, to record training videos for your tools.
You can edit the videos after the fact, but it's not required - a "good enough" video even with mistakes or corrections would be fine.
We recommend doing online Zoom trainings, during which you screenshare and pull up the recorded video(s), which allows you to play/pause/zoom in on certain parts of the video as needed, and pause to answer user questions.
These is an initial draft of instructions - please feel free to edit! -- Demis 2020-07-02
Procedure for recording
Outside the lab, before your training
- Fully charge your smartphone
- GoPro has a spare battery - make sure both are charged.
- Batteries charge while inserted into the GoPro camera, and then plug the USB cable in.
- Note that the GoPro USB cable is a high-quality (high data rate) USB-C/USB-A cable - cheaper versions usually don't work, so don't lose this cable!
- Download smartphone app called "GoPro" by the company "GoPro, Inc." to your own phone.
- Turn on the GoPro camera (hold down power button on the side)
- Connect your GoPro smartphone app to the camera (requires Bluetooth and WiFi enabled).
- Instructions for this can be found on the GoPro website here, also copy/pasted below.
- Pick up your camera:
- Power on your camera.
- Open the utility drawer by swiping from the top to the bottom of the touch display, then select "Preferences."
- Select "Connections" and then tap on "Connect Device."
- Tap on "GoPro App" to put your camera in pairing mode.
- At this point, you can tap on the "i" icon in the top right corner to see your WiFi name and password.
- Open the GoPro App on your SmartPhone:
- Select the Camera logo at the bottom left corner of the app and it will automatically begin scanning for your camera
- You should see "We Found Your GoPro" and a blue "Connect" button. Tap on Connect.
- You will see a section to change your camera's name, or you can tap on the bottom button to leave the name as it is.
- Once a name is set your GoPro App will show a live preview of your camera. You're all set!
- Pick up your camera:
- Instructions for this can be found on the GoPro website here, also copy/pasted below.
- Wear headphones for your smartphone (wireless is great, but wired is also ok).
- This helps with checking to see if a video sounds/looks ok.
- Put the GoPro on your head mount, and launch the GoPro phone app and "enable live preview".
- Detailed Instructions for this are below.
- Adjust the angle of the camera so the preview shows what you’re looking at. You want to be "naturally" looking at something, and make sure the GoPro shows the same thing.
- Usually the headmount will aim high - looking above what your eyes are looking at, so adjust it down.
In the lab
- Turn on camera - hold down the power button on the side.
- Place camera on mount - either head mount (use your own assigned head mount), or Clip mount etc.
- On GoPro smartphone app:
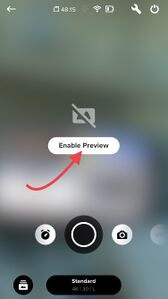
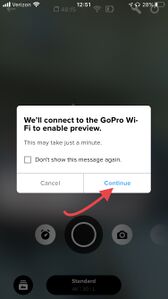
- Enable Live Preview to view the video from the SmartPhone App.
|
|
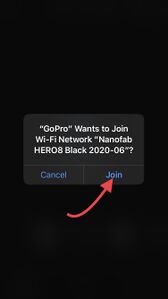
|
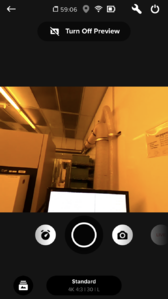
|
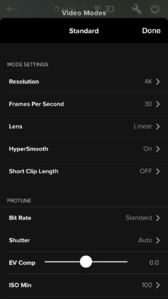
- Choose Video Mode and "Standard" preset
- The "standard" preset is set for training purposes (reduced field of view, high resolution, reduced motion correction)
Choose Video mode - 2nd from left.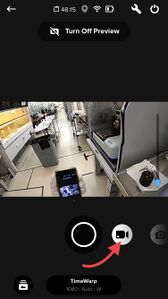
|
Use "Standard" settings.
|
Settings menu options.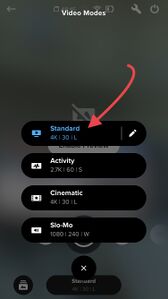
|
"Standard" settings for NanoFab trainings (Initial version, as of 2020-07-01 Demis) |
