Measurements and Imaging with Amscope Camera - Quickstart Usage Guide
A number of our microscopes now have Amscope cameras with accompanying free Amscope software installed.
The software has already been calibrated for measurements on each microscope, users should not perform any calibrations without consulting Staff first.
Start Imaging Session
- Open the "AmScope" software, via Desktop icon or Start-Bar icon:

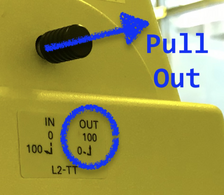
- Set the microscope shutter to use the camera:
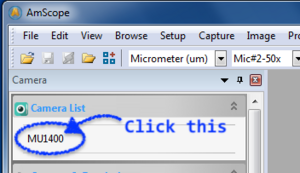
- Click the Camera in the software to begin acquiring images in the software:
Camera Rotation
You may turn the camera to adjust image rotation, but do not turn the camera more than 90°, to prevent unscrewing/altering focus.
You must put the camera back to 0° rotation when done (USB cable at the back).
Choosing the Calibration
In order for the software to know which objective you are using, you must choose the appropriately named Calibration from the dropdown lists. (eg. "5x, 10x, 20x etc."). Staff have set the software to display the Calibration/Objective name and microscope on the scale bar in the corner of the image.
There are 2 separate ways to choose the calibration to use.
During live imaging
BEFORE snapping the image:
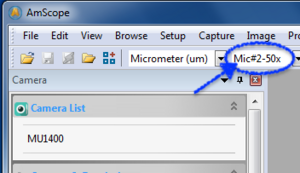
On the bar right above the image window, use the drop-down menu called Magnification, which is used for measuring live images. (This is also available from the top "Options" pull down menu). Choose the calibration from this list during live imaging, before clicking "Snap".
Capture the Image
Then, when the live image is ready, click [Snap] to capture an image. This image retains internal knowledge of which calibration was used during the capture, and is loaded into a new Tab.
After Image Capture
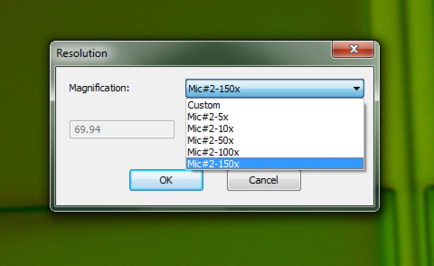
To change the calibration applied on an image that has already been captured, use the top menu bar item:
Menu "Image" > "Resolution". Choose the correct calibration setting for the objective lens you were using and you will now have calibrated measurements for the still image.
Saving an Image with Measurements
Perform measurements as desired using the various measurement tools (scale bars, line lengths etc.).
If you want the measurements saved onto the still image, use the menu item:
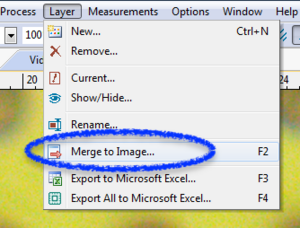
Layers > Merge to Image... to merge the annotation layer onto the image. This will create a new image tab that has your measurements burned into it, the original editable tab is also still open.
The subsequent "Export options" window allows you to choose the Font size for the text etc. "50" is typical.
Save your pictures as jpegs as normal with File > Save As....
You can save all open tabs into a folder with automatic naming using File > Batch Save.
End Session
- Set the Camera shutter back to Eyepiece imaging (pushed IN) when done.
- Close all your image tabs in AmScope (Right-click the "Live" tab and choose "Close all but this"), or just close the software.
Demis D. John, 2022-08-26
